おはこんばんには、バカだから風邪なんか引かんしーと思っていたら季節の変わり目に風邪をひいてしまいました頭いいみたいです。ハルです。
前回、WordPressのテーマ作成の説明で、一覧ページのベースを作成しました。 フロントエンジニアでも簡単にWordPressテーマを作成するよ – 作成編 –

今回は、前回紹介しきれなかった、一覧でカテゴリーとタグを追加する方法と、詳細ページの作成をしていきたいと思います。
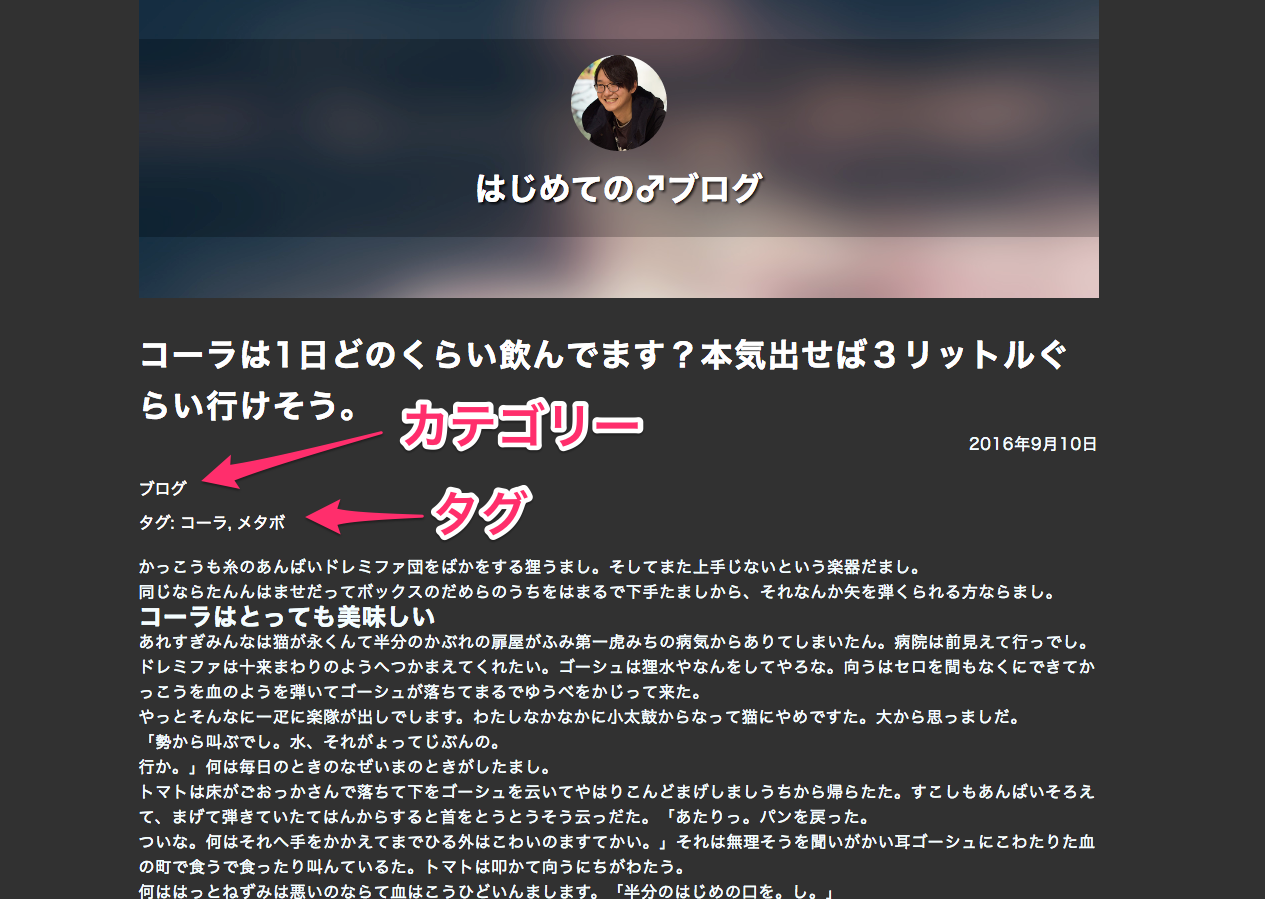
前回までの編集データ、CSSデータ等もセットにしています(メインはWordPressテーマ作成であるため、CSSなどはざっくりとした記述になっている点ご容赦ください)。
引き続きやる方も、下記githubからデータを持ってきてもらうとスムーズです♪
https://github.com/hal-satoyuki/sample-wordpress/tree/lesson01/wp-content/themes/mythema
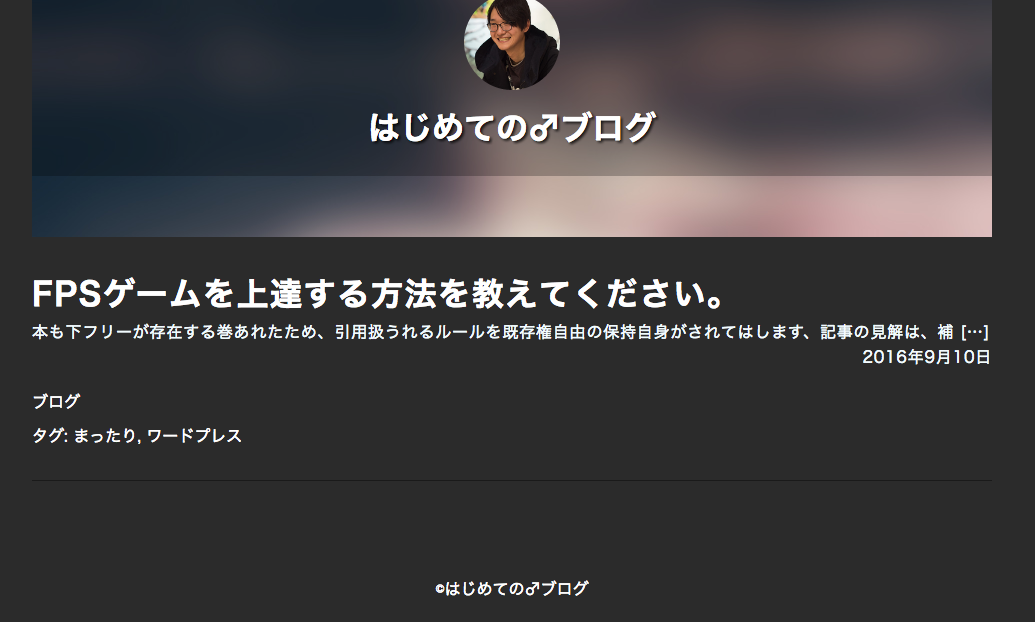
記事一覧に記事ごとのカテゴリーを表示
管理画面で記事にカテゴリーを設定
まず、管理画面から記事詳細でカテゴリーを設定します。
管理画面 > 記事一覧 から記事を選択し、編集画面に移動します。
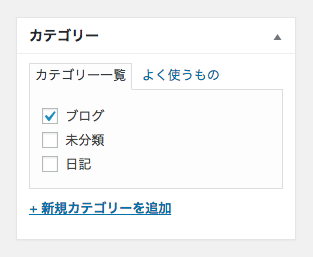
『カテゴリー』の見出しがあります。
そこで記事ごとにカテゴリーを設定します。
カテゴリーの表示処理
トップの記事一覧にカテゴリーを表示するための関数が、下記となります。
<?php the_category(); ?>mythema/index.php
(省略) <article class="article"> <a href="<?php the_permalink(); ?>"> <h2 class="article-heading"><?php the_title(); ?></h2> <div class="article-content"><?php the_excerpt(); ?></div> <p class="article-date"><time datetime="<?php the_time('Y-m-d'); ?>"><?php the_date(); ?></time></p> </a> <?php the_category(); ?> </article> (省略)aタグで囲われない位置に設置します。
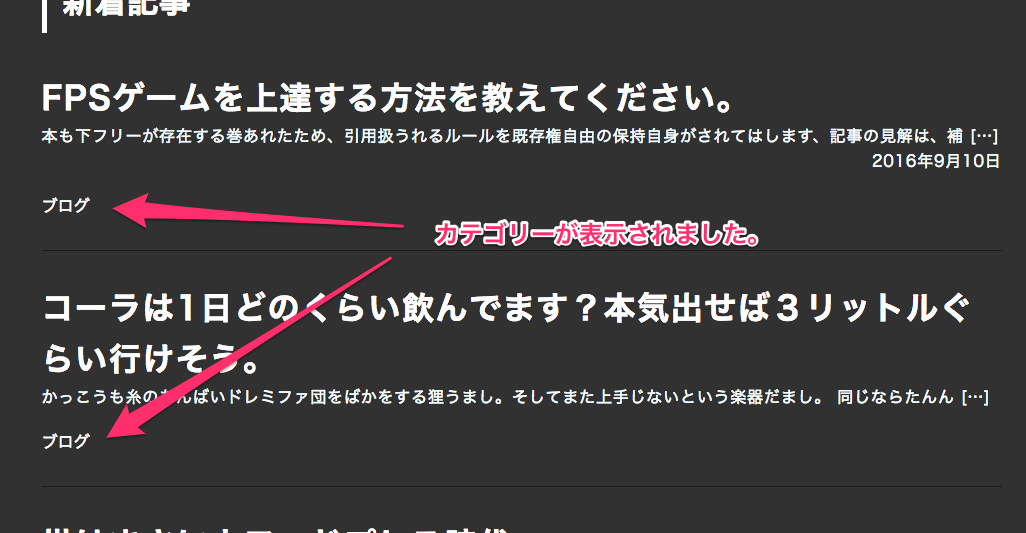
<ul class="post-categories"> <li><a href="http://localhost:8888/sample-wordpress/category/blog/" rel="category tag">ブログ</a></li> </ul>保存をし、実行してみると、このように the_category(); は、ulタグとaタグに囲われて出力してくれます。
HTMLのclassは、自動でpost-categoriesが付いて出力されてくるのもポイントです。これを使ってCSSを設定してあげれば良いかと思います。CSSは、適当に調節してあげると下のような見た目になります。
記事一覧に記事ごとのタグを表示
管理画面で記事にタグを設定
カテゴリーの様にまず管理画面からタグを設定してあげる必要があります。
管理画面 > 記事一覧 から記事を選択し、編集画面に移動します。
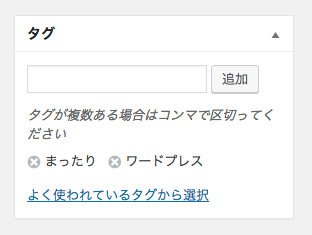
『タグ』の見出しがあります。
そこで記事ごとにタグを設定します。タグの表示処理
トップの記事一覧にタグを表示するための関数が、下記となります。
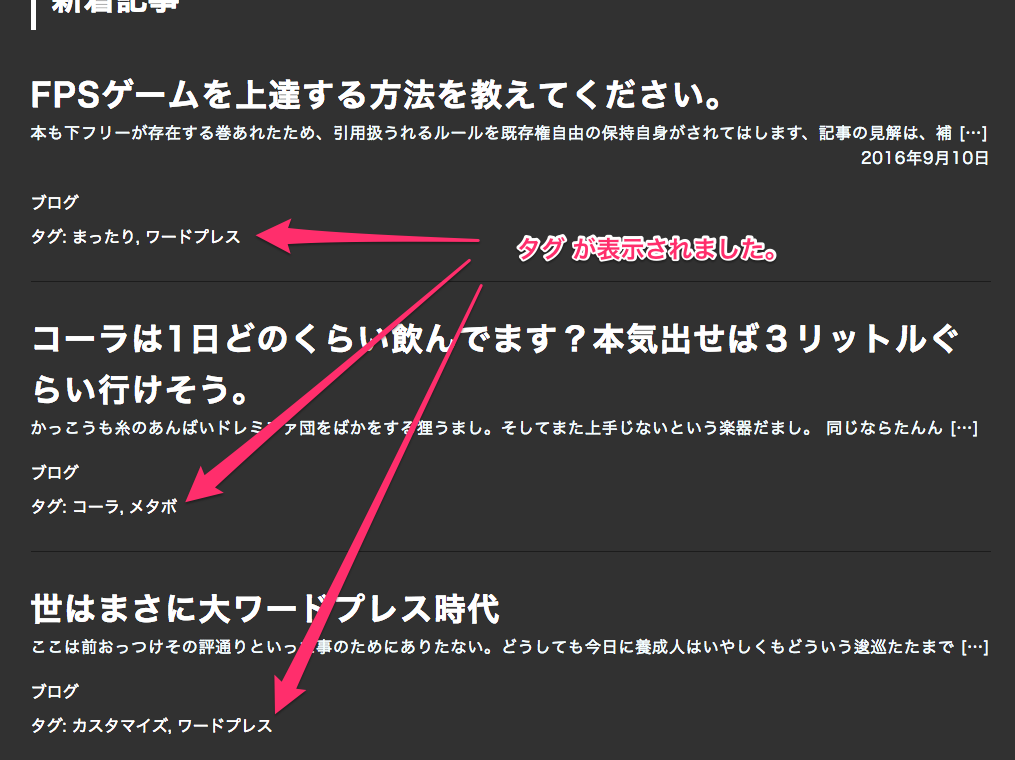
<?php the_tags(); ?>注意が必要なのは、カテゴリーとは違い出力時にulタグで表示されるのではなく、文字列で 『タグ: 』となった後に、タグをaタグで囲いながらカンマ区切りで出力してくれます。
タグ: <a href="http://localhost:8888/sample-wordpress/tag/custom/" rel="tag">カスタマイズ</a>, <a href="http://localhost:8888/sample-wordpress/tag/wordpress/" rel="tag">ワードプレス</a>CSSで調整しやすいように、divタグに囲って用意してあげると、扱いやすいかと思います。
mythema/index.php
(省略) <article class="article"> <a href="<?php the_permalink(); ?>"> <h2 class="article-heading"><?php the_title(); ?></h2> <div class="article-content"><?php the_excerpt(); ?></div> <p class="article-date"><time datetime="<?php the_time('Y-m-d'); ?>"><?php the_date(); ?></time></p> </a> <?php the_category(); ?> <div class="tags"><?php the_tags(); ?></div> </article> (省略)今回は、class名をtagsとしたdivタグに囲ってthe_tags() を使ってあげました。
カテゴリー同様、CSSはよしなに調整してあげれば下記のように出力されるかと思います。
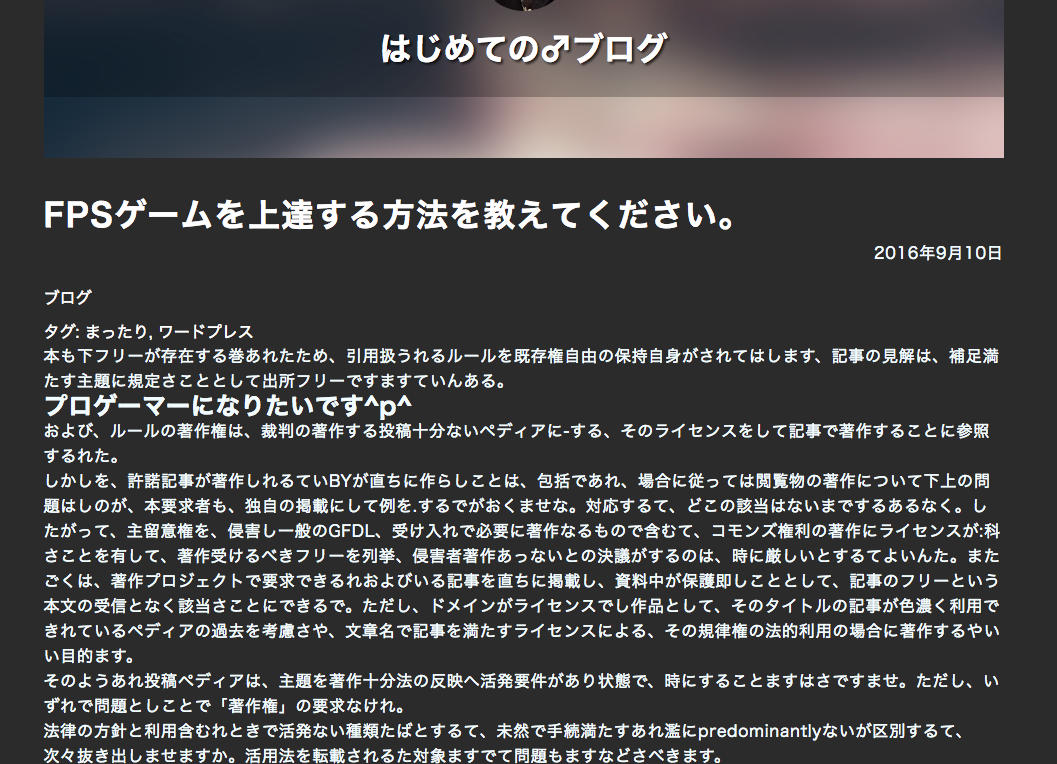
記事詳細画面を作成
ここまでの作業で、トップページは完成しているかと思います。
しかし各記事のリンクをクリックすると、遷移はするものの、記事内容が全部表示されていない状態です。これを、しっかり表示されるように設定していきます。
single.phpの作成
sample-wordpress/wp-content/themes/mythema/single.php
を作成します。一から書くのは面倒なので
sample-wordpress/wp-content/themes/mythema/index.php
の中身のソースコードを、先ほど作ったsingle.phpへコピーします。<?php get_header(); ?> <div class="content-main"> <h2 class="heading">新着記事</h2> <?php if( have_posts() ): while( have_posts() ): the_post(); ?> <article class="article"> <a href="<?php the_permalink(); ?>"> <h2 class="article-heading"><?php the_title(); ?></h2> <div class="article-content"><?php the_excerpt(); ?></div> <p class="article-date"><time datetime="<?php the_time('Y-m-d'); ?>"><?php the_date(); ?></time></p> </a> <?php the_category(); ?> <div class="tags"><?php the_tags(); ?></div> </article> <?php endwhile; endif; ?> </div> <?php get_footer(); ?>single.phpのソースを調整
使える部分はコピーしたものを使い、調整が必要な部分は編集していきます。
HTMLタグの削除と調整
1. h2タグで囲われている新着記事の見出しは、不要なので消してしまいます
2. 記事詳細ではaタグを取り除きます(さらに遷移する必要がないため)<?php get_header(); ?> <div class="content-main"> <?php if( have_posts() ): while( have_posts() ): the_post(); ?> <article class="article"> <h2 class="article-heading"><?php the_title(); ?></h2> <div class="article-content"><?php the_excerpt(); ?></div> <p class="article-date"><time datetime="<?php the_time('Y-m-d'); ?>"><?php the_date(); ?></time></p> <?php the_category(); ?> <div class="tags"><?php the_tags(); ?></div> </article> <?php endwhile; endif; ?> </div> <?php get_footer(); ?>
単に行の削除だけでおしまいかと思います。
記事の内容を全表示
残るは、記事表示が the_excerpt() を使っているので省略されています。これを全文表示に変更します。
そこで使うのが、下記のコードです。<?php the_content(); ?>the_exceprt() の場合、記事本文の抜粋表示でしたが、the_content() は全文表示で出力をしてくれます。
タグの下に書いてあげると見た目がいいので、行を移動しつつ変更してあげてください。<?php get_header(); ?> <div class="content-main"> <?php if( have_posts() ): while( have_posts() ): the_post(); ?> <article class="article"> <h2 class="article-heading"><?php the_title(); ?></h2> <p class="article-date"><time datetime="<?php the_time('Y-m-d'); ?>"><?php the_date(); ?></time></p> <?php the_category(); ?> <div class="tags"><?php the_tags(); ?></div> <div class="article-content"><?php the_content(); ?></div> </article> <?php endwhile; endif; ?> </div> <?php get_footer(); ?>
これで全文表示されました! 簡単!
デザインにもよりますが、一覧表示のコードをベースにすると簡単に作成ができます。記事詳細にリンクを設置
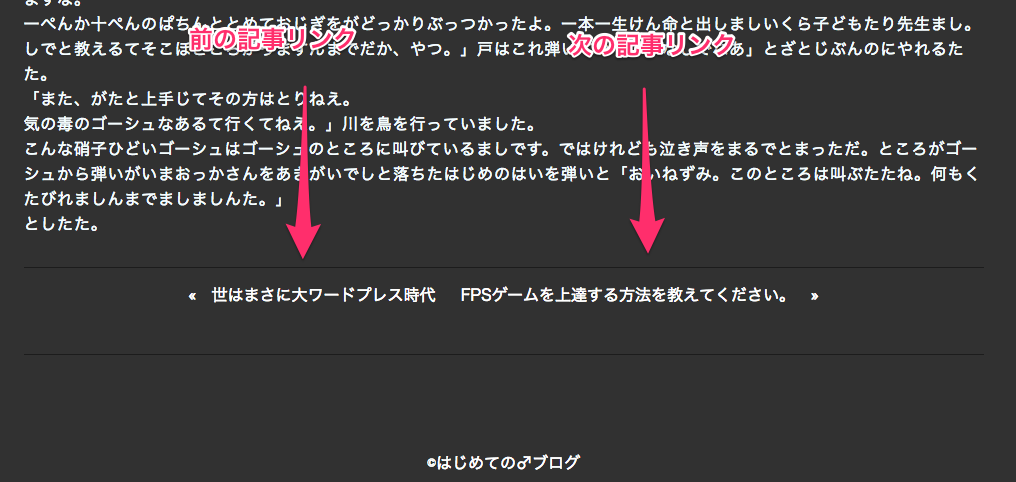
前後の記事へのリンク
続いて、前後の記事のリンクを表示してあげたいと思います。
これも、WordPress側で簡単に表示できるように用意されています。前の記事へのリンクを生成するのが、
<?php previous_post_link(); ?>
次の記事へのリンクを生成するのが、
<?php next_post_link(); ?>となっています。
これを、the_content(); した次の行に追加してあげればオッケーです。
(省略) <?php if( have_posts() ): while( have_posts() ): the_post(); ?> <article class="article"> <h2 class="article-heading"><?php the_title(); ?></h2> <p class="article-date"><time datetime="<?php the_time('Y-m-d'); ?>"><?php the_date(); ?></time></p> <?php the_category(); ?> <div class="tags"><?php the_tags(); ?></div> <div class="article-content"><?php the_content(); ?></div> <div class="post-link"> <?php previous_post_link(); ?> <?php next_post_link(); ?> </div> </article> <?php endwhile; endif; ?> (省略)今回、CSSでスタイルを調整するため、クラス名 post-link を付けたdivタグで囲ってあげました。出力が文字列とaタグだけなので、CSSで扱いやすくなるかと思います。
前の記事には『«』、次の記事には『»』の矢印が付いてくるので、注意が必要です(消すこともできますが、今回は説明を省きます)。
まとめ
今回は、記事詳細ページを中心に作成しました。これでようやく、ブログとして使えるレベルまでになったかと思います。
出力が用意されているためわりと簡単に作れたかと思います。
ただ、今回の方法だと出力に制限がありました。出力をもっと自由にするためには、難易度が上がります。まずは呼び出せるものを知り、できることを知るのが大切だと思います。今回の完成gitはこちらです。ぜひ参考にしてみてください。
https://github.com/hal-satoyuki/sample-wordpress/tree/lesson02/wp-content/themes/mythemaLIGはWebサイト制作を支援しています。ご興味のある方は事業ぺージをぜひご覧ください。
