
Technology部の菊池です。
今回はChatGPTを活用したクリーンなプログラミングを実践してみました。
- 何かしらのプログラミングやフレームワークの知見がある初級者以上のエンジニア
- ChatGPTで何かしらのプロンプトを実行したことがある方
上記のような方を対象に、プロンプトを使ってプログラムロジックを実装する方法を解説します。ChatGPTをプログラミングに活用したい方のご参考になれば幸いです。
※企業における生成AI活用事例のまとめ記事もぜひご覧ください
実践の背景
ChatGPTを使ってクリーンなプログラミングを作成したいと思った背景は主に2つ。エンジニアやオフショア拠点メンバーに頼らずに開発を行い、工数削減を図るためと、プログラム開発におけるQCD(品質、コスト、納期)を向上させるためです。
LIGではAsanaやGithubで指示書をつくり、それを社内エンジニアもしくはオフショア拠点メンバーに制作してもらうフローをとっています。よって、開発においてはエンジニアの工数だけでなく、ディレクターの指示書作成や成果物を検証する工数もかかっています。
例えば、IDとパスワードを検証する検証するための簡単なサービスをオフショア拠点に依頼する場合は、おおよそ以下の工数が必要です。
| ディレクターの工数 | エンジニアの工数 | 合計時間 |
|---|---|---|
|
|
10時間 |
これらの工数を少しでも削減できないか、またクリーンコードを実現してQCD向上にも役立てないかと思い、ChatGPTでプログラミングを実践してみることにしました。
基礎知識:クリーンコードとは
クリーンコードとは、「可読性」「メンテナンス性」「拡張性」の3つが揃ったコードのことです。
開発における生産性の向上、バグの防止など、クリーンコードにはさまざまなメリットがあります。詳しくは下記の記事で解説していますので、ぜひご覧ください。
高凝集・低結合な「クリーンコード」を実現するためにやるべきこと
また、プログラミングにはCopilotなどの生成AI補助ツールを活用するのもおすすめです。これらツールの使い方については、以下の記事で解説していますのであわせてご覧ください。
コード生成ツール「GitHub Copilot」「Amazon CodeWhisperer」「Codium」を比較してみた
前提
環境・要件
今回は以下の要件でコードを作ってみます。
- 開発環境
-
- Typescript
- NestJS
- 開発要件
-
- IDとパスワードを照合するためのサービスを作る
- Jestでテストコード付きとする
NestJSを採用したのは、クリーンなコードを書くための要素が揃っているためです。
NestJSはTypeScriptをベースにしているため、静的型付けの恩恵を受けられるうえ、コントローラー、サービス、エンティティといった要素で構造化されています。そのため、アプリケーションの各部分が明確に分離され、メンテナンスや拡張が容易にできます。
また、NestJSには依存性注入(DI)機能が標準で搭載されており、コンポーネント間の依存関係を効率的に管理可能です。
使用したChatGPTモデル
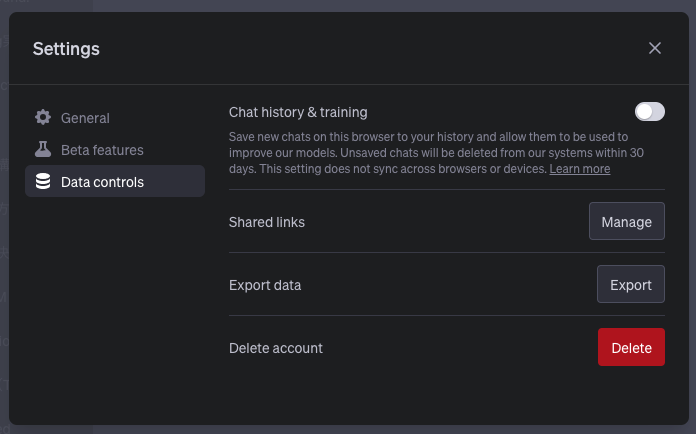
今回はChatGPTのGPT-4モデルを使って実装検証します。ソースコードをOpenAI社に学習させたくない場合は、設定から「Chat history & traning」(チャット履歴とトレーニング)をOFFにしておきましょう。
「コードを外部に送信せず、内部のセキュアな環境だけに送りたい」という場合は、Azure OpenAI Serviceを立ち上げて独自のサーバーを起動推奨です。詳細はAzure OpenAI ServiceとOpenAIのAPIのどちらを使うべきか解説した記事もご参照ください。
ChatGPTを使ったプログラミングの流れ
Custom Instructionsの設定
ChatGPTにはCustom Instructionsという機能が搭載されています。簡単に言うと、ChatGPTに役割を与え、その役割にしたがって出力してもらう機能です。
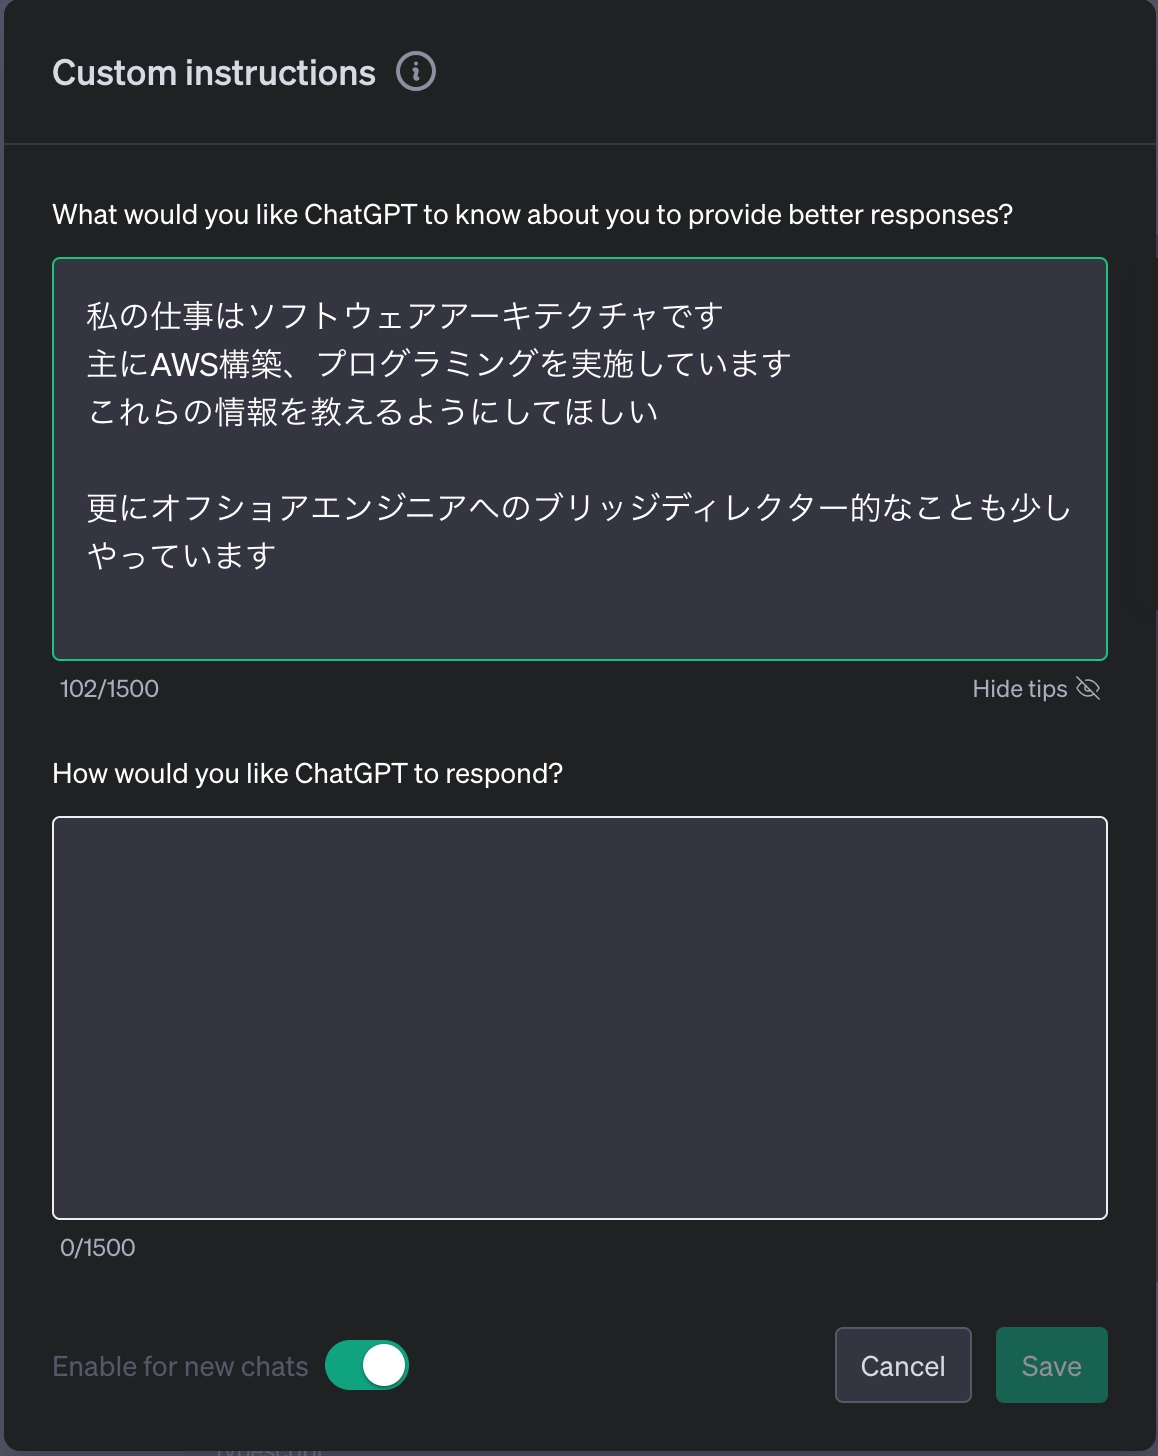
今回は上の画像のようにプロンプトを設定しました。
プロンプト内容
設定したプロンプト内容は以下の通りです。入出力できるトークン数に制限があることから、まずはJestなしでの出力を依頼しました。コントローラーについてもプロンプトには含めないようにしています。
console

NestJSのサンプルコードを考えて欲しいです
以下の要件のサービスをつくってください

”””
- IDとパスワードを照合するAuthenticationService
- パスワードはDBにハッシュで管理されている(ソルト値は5)
- パスワードとIDはuserエンティティに保存される
- ORMはTypeORMを使う
- もし照合がOKであればtrueを返す
- もし照合がNGならばfalseを返す
"""

上記のサービスに対するjestコードを作ってください
テストケースは以下の通りです

”””
- IDがない場合
- パスワードがない場合
- 正常
”””

またコントローラーについても定義してほしい

”””
- パラメータにIDとパスワードを設定する
- エンドポイントは/user/login
- エラーの場合は401エラー
”””

また上記についてjestも作って欲しい

”””
- 正常系
- 異常系
”””
出力結果
出力結果は以下の通りです。
出力結果(クリックで開きます)
- user.entity.ts
user.entity.ts
typescript
import { Entity, PrimaryGeneratedColumn, Column } from 'typeorm';

@Entity()
export class User {
  @PrimaryGeneratedColumn()
  id: number;

  @Column()
  username: string;

  @Column()
  password: string;
}
typescript
import { Injectable } from '@nestjs/common';
import { InjectRepository } from '@nestjs/typeorm';
import { Repository } from 'typeorm';
import * as bcrypt from 'bcrypt';
import { User } from './user.entity';

@Injectable()
export class AuthenticationService {
  constructor(
    @InjectRepository(User)
    private userRepository: Repository<User>,
  ) {}

  async validateUser(username: string, password: string): Promise<boolean> {
    const user = await this.userRepository.findOne({ username });

    if (!user) {
      return false;
    }

    const isMatch = await bcrypt.compare(password, user.password);
    return isMatch;
  }
}
typescript
import { Test, TestingModule } from '@nestjs/testing';
import { AuthenticationService } from './authentication.service';
import { getRepositoryToken } from '@nestjs/typeorm';
import { User } from './user.entity';
import * as bcrypt from 'bcrypt';

describe('AuthenticationService', () => {
  let service: AuthenticationService;
  let mockUserRepository;

  beforeEach(async () => {
    mockUserRepository = {
      findOne: jest.fn(),
    };

    const module: TestingModule = await Test.createTestingModule({
      providers: [
        AuthenticationService,
        {
          provide: getRepositoryToken(User),
          useValue: mockUserRepository,
        },
      ],
    }).compile();

    service = module.get<AuthenticationService>(AuthenticationService);
  });

  it('should return false if username is not found', async () => {
    mockUserRepository.findOne.mockReturnValue(null);
    expect(await service.validateUser('unknown', 'password')).toBe(false);
  });

  it('should return false if password is incorrect', async () => {
    const hashedPassword = await bcrypt.hash('correct_password', 5);
    mockUserRepository.findOne.mockReturnValue({ username: 'known', password: hashedPassword });

    expect(await service.validateUser('known', 'wrong_password')).toBe(false);
  });

  it('should return true if username and password are correct', async () => {
    const hashedPassword = await bcrypt.hash('correct_password', 5);
    mockUserRepository.findOne.mockReturnValue({ username: 'known', password: hashedPassword });

    expect(await service.validateUser('known', 'correct_password')).toBe(true);
  });
});
typescript
// user.controller.ts
import { Controller, Post, Body, HttpException, HttpStatus } from '@nestjs/common';
import { AuthenticationService } from './authentication.service';

@Controller('user')
export class UserController {
  constructor(private readonly authService: AuthenticationService) {}

  @Post('login')
  async login(@Body('username') username: string, @Body('password') password: string) {
    const isValid = await this.authService.validateUser(username, password);
    if (!isValid) {
      throw new HttpException('Unauthorized', HttpStatus.UNAUTHORIZED);
    }
    return { status: 'OK' };
  }
}
typescript
// authentication.service.spec.ts
import { Test, TestingModule } from '@nestjs/testing';
import { AuthenticationService } from './authentication.service';
import { getRepositoryToken } from '@nestjs/typeorm';
import { User } from './user.entity';
import * as bcrypt from 'bcrypt';

describe('AuthenticationService', () => {
  let service: AuthenticationService;

  beforeEach(async () => {
    const module: TestingModule = await Test.createTestingModule({
      providers: [
        AuthenticationService,
        {
          provide: getRepositoryToken(User),
          useValue: {
            findOne: jest.fn().mockImplementation((username) => {
              if (username.username === 'test') {
                return { username: 'test', password: bcrypt.hashSync('password', 5) };
              }
              return null;
            }),
          },
        },
      ],
    }).compile();

    service = module.get<AuthenticationService>(AuthenticationService);
  });

  it('should be defined', () => {
    expect(service).toBeDefined();
  });

  it('should return false if username is not found', async () => {
    expect(await service.validateUser('unknown', 'password')).toBe(false);
  });

  it('should return false if password is incorrect', async () => {
    expect(await service.validateUser('test', 'wrongpassword')).toBe(false);
  });

  it('should return true if username and password are correct', async () => {
    expect(await service.validateUser('test', 'password')).toBe(true);
  });
});
// user.controller.spec.ts
import { Test, TestingModule } from '@nestjs/testing';
import { UserController } from './user.controller';
import { AuthenticationService } from './authentication.service';
import { HttpException, HttpStatus } from '@nestjs/common';

describe('UserController', () => {
  let controller: UserController;
  let authService: AuthenticationService;

  beforeEach(async () => {
    authService = { validateUser: jest.fn() } as any;
    const module: TestingModule = await Test.createTestingModule({
      controllers: [UserController],
      providers: [{ provide: AuthenticationService, useValue: authService }],
    }).compile();

    controller = module.get<UserController>(UserController);
  });

  it('should be defined', () => {
    expect(controller).toBeDefined();
  });

  it('should return 401 if validation fails', async () => {
    authService.validateUser.mockResolvedValue(false);
    await expect(controller.login('test', 'wrongpassword')).rejects.toThrow(
      new HttpException('Unauthorized', HttpStatus.UNAUTHORIZED),
    );
  });

  it('should return OK if validation succeeds', async () => {
    authService.validateUser.mockResolvedValue(true);
    await expect(controller.login('test', 'password')).resolves.toEqual({ status: 'OK' });
  });
});
指定もしていないentityのコードまで出してくれるという出血サービス! 全体的なコードを見ても、与件に対するコントローラーやサービスを作ってくれています。
また各コードは構造化されており、DI(依存性)も注入していました。各コードの凝集度や結合度も低い形となっており、NestJSの作法に則ってコードが出力されています。
テストコードもMock化されているので、あとは動かしながらChatGPTに修正案を出してもらえば完結できそうです。
API仕様書の生成
さらに続けて、「上記についてSwagger形式のAPI仕様書を作って」とプロンプトを入力することで、Swagger形式によるAPI仕様書も作ってくれました。
出力結果(クリックで開きます)
openapi: "3.0.0"
info:
  version: "1.0.0"
  title: "Authentication API"
  description: "API for authenticating users"
paths:
  /user/login:
    post:
      summary: "Login a user"
      description: "This can only be done by the logged in user."
      operationId: "loginUser"
      requestBody:
        description: "Created user object"
        required: true
        content:
          application/json:
            schema:
              $ref: "#/components/schemas/Login"
      responses:
        "200":
          description: "successful operation"
          content:
            application/json:
              schema:
                $ref: "#/components/schemas/ApiResponse"
        "401":
          description: "Unauthorized"
          content: {}

components:
  schemas:
    Login:
      type: "object"
      properties:
        username:
          type: "string"
        password:
          type: "string"
    ApiResponse:
      type: "object"
      properties:
        status:
          type: "string"
コード修正
例えばAPI仕様について、コントローラーにバリデーションチェックを入れたい場合(usernameがメール形式かどうかなど)、追加でプロンプトを入れるとコードを生成してくれます。このように一度作られたコードに対して、新たにプロンプトを入れることでブラッシュアップしていくことができそうです。
ただしGPT4では入出力できるトークン数(※)の最大値が決まっているため、会話が長くなると過去の内容が忘れ去られてしまいます。その場合は一つひとつのクラスやモジュール、関数に対して細かい指示を出していくのが望ましいです。
※ChatGPTにはテキストデータの入力単位として「トークン」という単位が用いられます。トークン数の最大値などの情報は、OpenAI社の公式ドキュメントに記載されています。
現に、以下のプロンプトはコントローラーまで出してくれましたが、jestの修正コードとAPI仕様書の修正まで出してくれませんでした。
console

コントローラーについて修正してほしい
usernameとパスワードは必須で、usernameがメール形式になっているかどうかのバリデーションチェックをコントローラーに追加
出力結果(クリックで開きます)
・user.controller.ts
typescript
import { Controller, Post, Body, HttpException, HttpStatus, UsePipes, ValidationPipe } from '@nestjs/common';
import { AuthenticationService } from './authentication.service';
import { LoginDto } from './login.dto';

@Controller('user')
export class UserController {
 constructor(private readonly authService: AuthenticationService) {}

 @UsePipes(new ValidationPipe())
 @Post('login')
 async login(@Body() loginDto: LoginDto) {
   const { username, password } = loginDto;
   const isValid = await this.authService.validateUser(username, password);
   if (!isValid) {
     throw new HttpException('Unauthorized', HttpStatus.UNAUTHORIZED);
   }
   return { status: 'OK' };
 }
}
・login.dto.ts
typescript
import { IsEmail, IsNotEmpty } from 'class-validator';

export class LoginDto {
  @IsEmail()
  username: string;

  @IsNotEmpty()
  password: string;
}
結果
実際の開発においては上記の状態からさらにJestをコマンドで実行したり、テストしたりする必要がありますが、それを含めても3時間程度で完了(通常の開発より7時間工数削減)できると見込んでいます。
さいごに
ご覧の通り、NestJSのような広く採用されているフレームワークやプログラミング言語を用いた場合、GPT(Generative Pre-trained Transformer)を活用したプログラミング開発は十分に実現可能だと思います。
NestJSはその設計がよく構造化されており、クリーンアーキテクチャの採用によってさらに読みやすく、メンテナンスしやすいコードを書くことができます。
品質面では、NestJSの標準機能として提供されるDI(依存性)注入やモジュール性が、高品質なコードの作成をサポートしています。これにより、QCDの各面で良好な結果を期待できる。
さらに、NestJSは低結合かつ高凝集のコードを書きやすい設計となっている。これにより、サービスやコントローラー単位での開発も効率的に行え、GPTを用いた自動コーディングやプロンプトベースの開発も容易に実現できる。
このように、、ソフトウェア開発におけるNestJSとGPTの組み合わせは、QCDを全面的に向上させつつ、工数削減も図れる強力な手段と言えるでしょう。
最新情報をメルマガでお届けします!
LIGブログではAIやアプリ・システム開発など、テクノロジーに関するお役立ち記事をお届けするメルマガを配信しています。
- <お届けするテーマ>
-
- 開発プロジェクトを円滑に進めるためのTIPS
- エンジニアの生産性が上がった取り組み事例
- 現場メンバーが生成AIを使ってみた
- 開発ツールの使い方や開発事例の解説
- AIをテーマにしたセミナーの案内
- 最新のAI関連ニュースまとめ など
「AIに関する最新情報を集めたい!」「開発ツールの解説や現場の取り組みを知りたい!」とお考えの方は、ぜひお気軽に無料のメルマガをご購読くださいませ。
この記事のシェア数

2004年大学卒業後に大手SIerにて組み込み系エンジニアとして10年従事。一度はIT業界から足を洗う形にはなるものの、2016年からSES企業にてサイドエンジニアとしてチャレンジ。2020年からLIGにジョインし、様々な案件のテクニカルディレクター並びにプロジェクトマネージャーとして参加する。
このメンバーの記事をもっと読む