こんにちは。LIG CTOのづやです。
とうとうiphone 5sが発売しますね。僕もそろそろiphoneに変えようかと思っていたり、いなかったり・・・
さて、今回はWordPressの画像をトリミングする時の基点を変える方法をご紹介します。
wordpressにはadd_image_sizeという関数があります。
以下のような機能を持っています。
/**
 * $name 新しい画像サイズの名前
 * $width 横幅
 * $height 高さ
 * $crop 切り抜くか切り抜かないか
 */
add_image_size( $name, $width = 0, $height = 0, $crop = false )こいつの$cropを指定すると画像を真ん中で切り抜いてくれます。
で、下記の用にfunctions.phpとかで指定して、画像をアップしてみます。
// 200×200で指定しろって設定をしてみます
add_image_size( 'test', 200, 200 , true);
こいつがアップした画像です。
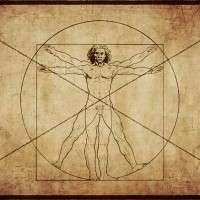
切抜き後の画像はこんな感じで真ん中を抜き取ってくれます。
でも真ん中ではなくて右上を基点にしてトリミングしたいなってことがあったんで調べてみたら、image_resize_dimensionsなる関数でリサイズ後のサイズを計算していることを発見しました。image_resize_dimensionsの中で同じ名前のフィルターを利用してくれてるのでいろいろいじれそうです。
//media.phpの328行目で呼ばれてます
// 呼んでる箇所
$output = apply_filters( 'image_resize_dimensions', null, $orig_w, $orig_h, $dest_w, $dest_h, $crop );
if ( null !== $output )
	return $output;
image_resize_dimensionsというフィルターを読んでいるので、こいつを利用します。
// functions.phpに記述
function test_resize_dimensions( $first, $orig_w, $orig_h, $dest_w, $dest_h, $crop ){

	if( false ) return $first;

	if ( $crop ) {
		// crop the largest possible portion of the original image that we can size to $dest_w x $dest_h
		$aspect_ratio = $orig_w / $orig_h;
		$new_w = min($dest_w, $orig_w);
		$new_h = min($dest_h, $orig_h);

		if ( !$new_w ) {
			$new_w = intval($new_h * $aspect_ratio);
		}

		if ( !$new_h ) {
			$new_h = intval($new_w / $aspect_ratio);
		}

		$size_ratio = max($new_w / $orig_w, $new_h / $orig_h);

		$crop_w = round($new_w / $size_ratio);
		$crop_h = round($new_h / $size_ratio);

		// ↓もとの設定
		//$s_x = floor( ($orig_w - $crop_w) / 2 ); // 切抜き時のX起点
		//$s_y = floor( ($orig_h - $crop_h) / 2 ); // 切抜き時のY起点
		// 左上にしたい場合
		//$s_x = 0;
		//$s_y = 0;
		// 右上にしたい場合
		$s_x = floor( ($orig_w - $crop_w) );
		$s_y = 0;

	} else {
		// don't crop, just resize using $dest_w x $dest_h as a maximum bounding box
		$crop_w = $orig_w;
		$crop_h = $orig_h;

		$s_x = 0;
		$s_y = 0;

		list( $new_w, $new_h ) = wp_constrain_dimensions( $orig_w, $orig_h, $dest_w, $dest_h );
	}

	// if the resulting image would be the same size or larger we don't want to resize it
	if ( $new_w >= $orig_w && $new_h >= $orig_h )
		return false;

	// the return array matches the parameters to imagecopyresampled()
	// int dst_x, int dst_y, int src_x, int src_y, int dst_w, int dst_h, int src_w, int src_h
	return array( 0, 0, (int) $s_x, (int) $s_y, (int) $new_w, (int) $new_h, (int) $crop_w, (int) $crop_h );
}
add_filter( 'image_resize_dimensions', 'test_resize_dimensions', 10, 6 );
$s_xと$s_yをいじると、色々適用できました。
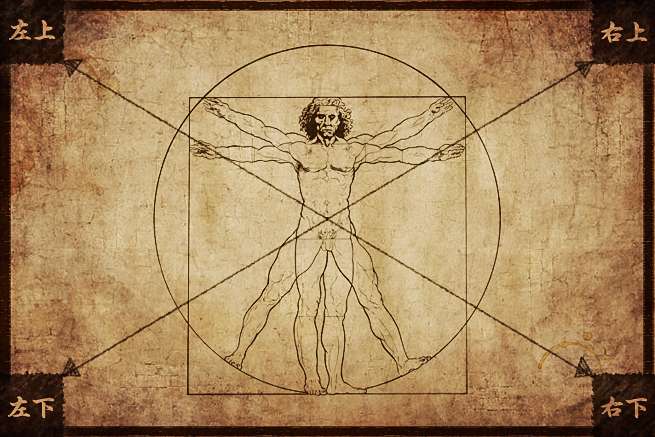
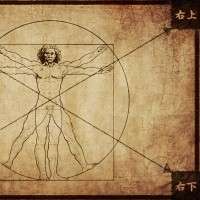 右上設定時はこんな感じです。
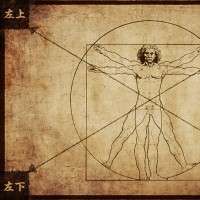 左上設定時はこんな感じです。
実際に使うとしたらもう一工夫入りそうな感じですが、とりあえずやりたいことはこのフィルターでできそうでした。
※wordpress3.6時点の情報です。
LIGはWebサイト制作を支援しています。ご興味のある方は事業ぺージをぜひご覧ください。