個人ブログをNode.jsで作るのを最近の目標にしているハルです。
今回は、Node.js 製 のCMS「KeystoneJS」をサーバーで公開する方法について調べながら挑戦したので、そのことを書いてみました。
直接サーバーにKeystoneJSをインストールし、起動しアクセスしていきたいと思います。
目次
環境について
CentOS7に Nginxでを用意し、アクセスできる状態までは用意します。Node.jsをバージョン管理のnodebrewを用意しました。mongodbも必要なのでインストールし、起動済みにしてあります。
環境情報
CnetOS 7 nodebrew 0.9.8 Nginx 1.13.8 mongodb v3.4.11 Node.js v9.2.0
npmでインストール
pm2のインストール
$ npm install -g pm2pm2はNode.jsをデーモン化するのに使用します。npmコマンドでグローバルでインストールします。
https://www.npmjs.com/package/pm2
yoコマンドインストール
$ npm install -g yohttps://www.npmjs.com/package/yo
keystoneジェネレーターのインストール
$ npm install -g generator-keystonekeystoneを用意するのに『yo(YEOMAN)』と『generator-keystone』もインストールします。
ジェネレーターでKeystone.jsを用意
適当な場所にディレクトリを作成し、yoコマンドでkeystone.jsの
$ yo keystone一つひとつ、質問が出てくるので答えていきます。画像保存にCloudinaryというサービスを使っているのであらかじめアカウントを作成しておくと良いかと思います。
今回の設定
最初の質問にあるように blogというプロジェクト名にしました。
ブログ機能のみでギャラリーやお問い合わせ機能はつけないようにしました。
詳しい記事はQiitaの方で記事を書いたので、そちらを参考にしてください。
https://qiita.com/sato_yuki/items/57b557e5cccb699ac026
Welcome to KeystoneJS.

? What is the name of your project? blog
? Would you like to use Pug, Nunjucks, Twig or Handlebars for templates? [pug
 | nunjucks | twig | hbs] pug
? Which CSS pre-processor would you like? [less | sass | stylus] less
? Would you like to include a Blog? Yes
? Would you like to include an Image Gallery? No
? Would you like to include a Contact Form? No
? What would you like to call the User model? User
? Enter an email address for the first Admin user: hoge@fuga.com
? Enter a password for the first Admin user:
 Please use a temporary password as it will be saved in plain text and change
 it after the first login. *****
? Would you like to create a new directory for your project? Yes
? ------------------------------------------------
    Would you like to include Email configuration in your project?
    We will set you up with an email template for enquiries as well
    as optional mailgun integration No
? ------------------------------------------------
    KeystoneJS integrates with Cloudinary for image upload, resizing and
    hosting. See http://keystonejs.com/docs/configuration/#services-cloudinar
y for more info.

    CloudinaryImage fields are used by the blog template.

    You can skip this for now (we'll include demo account details)

    Please enter your Cloudinary URL: cloudinary://*************
? ------------------------------------------------
    Finally, would you like to include extra code comments in
    your project? If you're new to Keystone, these may be helpful. Yes
しばらくすると処理が終わり、
To start your new website, run "cd blog" then "node keystone".のように出たかと思います。
メールアドレスパスワードの表示を削除
このままだとトップに、管理画面へのログイン用のユーザー名とパスワードが表示されているので 取り除いておきます。今回私は /blog というディレクトリ名で作成したので下記のようにcdコマンドで移動し対象のファイルを開きます。
$ cd ./blog/templates/views
$ vi ./index.pug
下記のようにジェネレータで設定したメールアドレスとパスワードがある行があるので削除しておきます。
p We have created a default Admin user for you with the email <strong>hoge@fuga.com</strong> and the password <strong>*****</strong>.Keystone.jsをデーモン化
pm2で 『keystone.js』ファイルをデーモン化します。 先ほどファイル編集で『./blog/templates/views』に移動していたので下記のように移動します。
$ cd ../../
$ pm2 start keystone.js
状態を確認
$ pm2 list
┌──────────┬──────┬─────────┬───┬─────┬────────────┐
│ Name     │ mode │ status  │ ↺ │ cpu │ memory     │
├──────────┼──────┼─────────┼───┼─────┼────────────┤
│ keystone │ fork │ online  │ 0 │ 0%  │ 121.4 MB   │
└──────────┴──────┴─────────┴───┴─────┴────────────┘
Nginxの設定
現在下記のようにcurlコマンドを実行するとアクセスできてる状態かと思うので、
$ curl http://localhost:3000Nginxで下記のように設定しブラウザからアクセスできるように設定します。
$ sudo vi /etc/Nginx/conf.d/default.conf# 追記
upstream keystone {
server localhost:3000;
}
server {
listen 80;
server_name hoge.fuga;
(省略)
location / {
# コメントアウト
# root /usr/share/Nginx/html;
# コメントアウト
# index index.html index.htm;
# 追記
proxy_pass http://keystone;
}
(省略)設定の反映
$ sudo Nginx -s reload確認
サイトにアクセスしてみます。

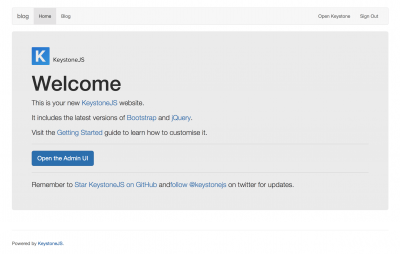
KeystoneJSのトップが表示されました。
まとめ
最初に書いたように最近、Node.jsを勉強し始めてKeystoneJSに挑戦しているところなのですが、今回は公開はどのようにやるのか調べて挑戦してみました。すごく基本的な動作確認だけですが、一歩は踏み出せたかと思います。引き続きNode.js・KeystoneJSの勉強をしていきたいと思います。
LIGはWebサイト制作を支援しています。ご興味のある方は事業ぺージをぜひご覧ください。


